Let Freedom Ring Table Topper Tutorial
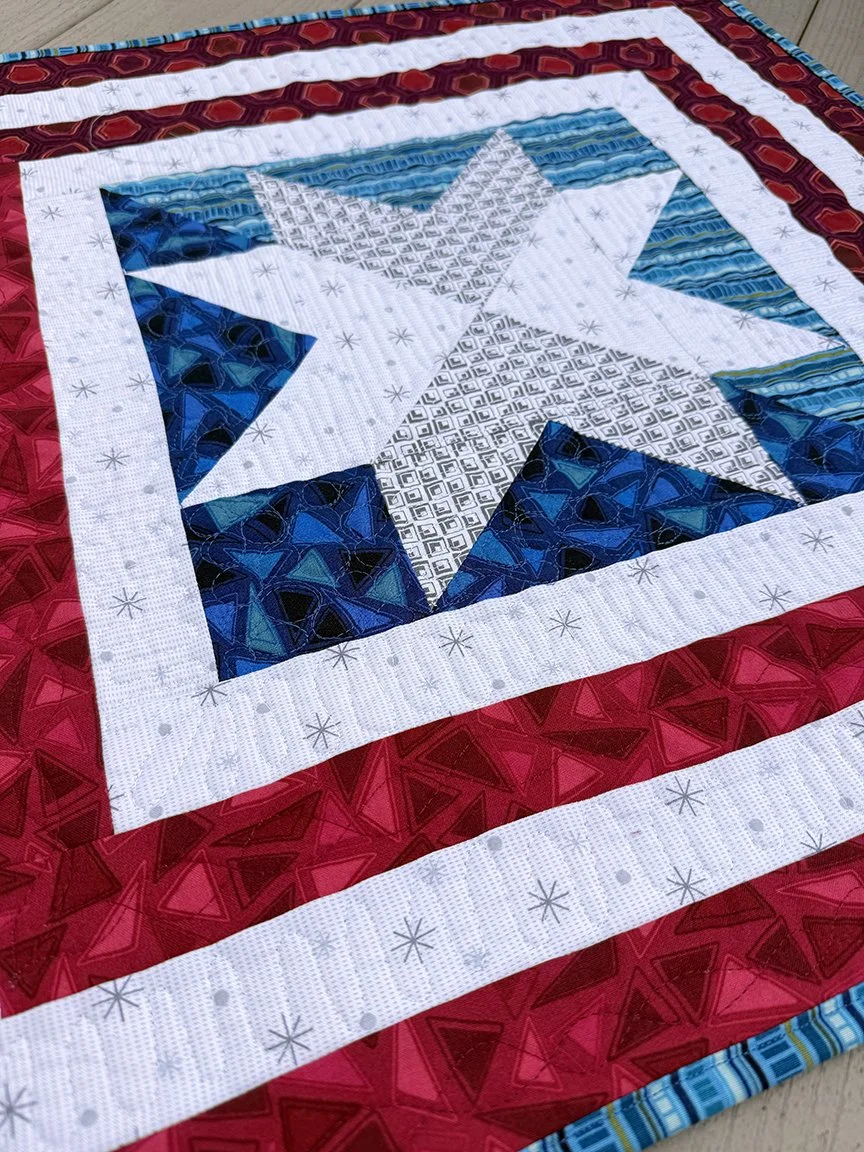
Fresh off my sewing machine and just in time for July 4th, I’m sharing a small table topper tutorial. I decided not to add to the millions of “star” titled projects (including several of my own patterns!) and instead call this topper “Let Freedom Ring.” More on that below. This topper is made using my brand new Refresh fabrics from Benartex, arriving in shops this summer (please ask your local shop to carry it if you like the prints!). Let’s take a look:
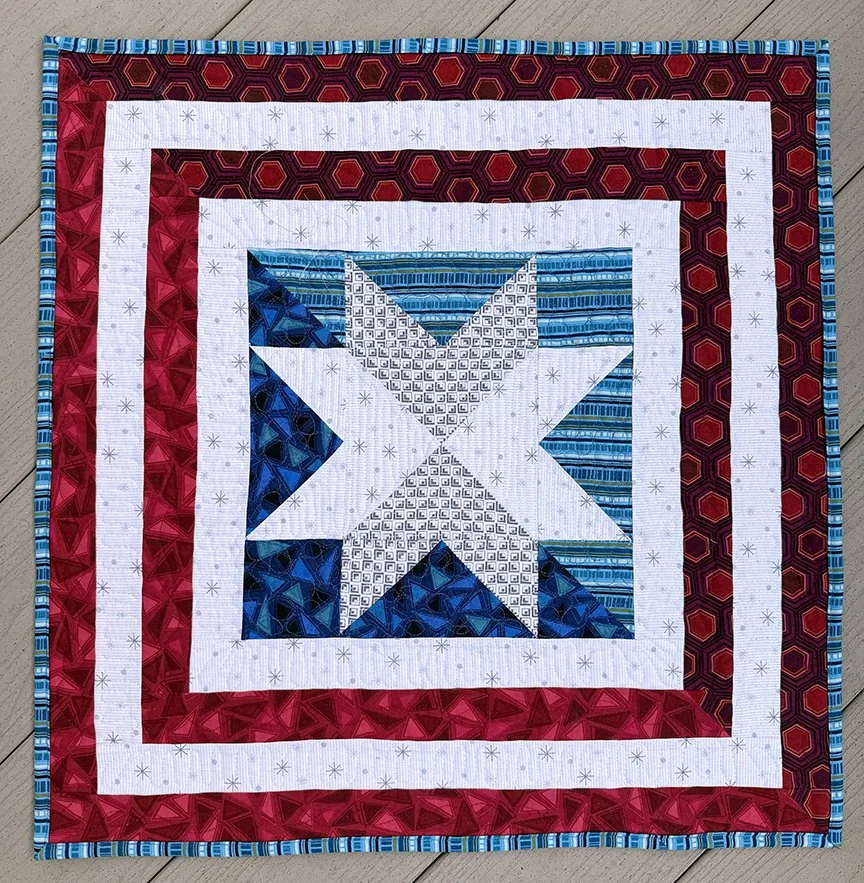
I had fun playing with the idea of a split background behind the star (which extends into the striped borders), as well as the two tone star in the middle. The finished topper measures 24” square, and it goes together very quickly! Keep reading for the step by step tutorial below.
But first…I want to talk briefly about patriotic quilts. I made and shared two small red, white and blue projects recently; this one, and the Patriotic Liberty Banner for my FB Live with Thermoweb’s (find details here). I definitely paused before choosing to make a patriotic looking project, much less two, because I’m extremely concerned about what’s happening in our country, and I wondered if projects like these somehow condoned current events.
Here’s what I believe: I believe in the unalienable rights the founders laid out in the Declaration of Independence: life, liberty and the pursuit of happiness. I believe in equal rights for all, the humanity of all, and the idea that we are stronger when we work together for the betterment of everyone.
And here’s what I decided: I’m cheering for a country that strives for those ideals - the beliefs the United States was founded on. That’s the America I want to return to/be in the future. And so in a time when patriotism feels political and frankly a bit icky, I’m choosing to make projects that speak to my hope for my country’s future. My first banner says “Liberty;” the one in this post is named “Let Freedom Ring.” Both are meant to represent the best America has to offer, and a hope that we can collectively do better each day to ensure the freedoms and rights our country was founded on.
And now back to the tutorial.
You’ll Need:
(Refresh fabric listed)
(1) fat eighth each Gray Mini Cabins and Blue Party Geese
5/8 yard White Sparkle Dot
1/2 yard Denim Stitching Lines, includes binding
1/4 yard each Red Party Geese and Wine Hexie Pops
28” square backing fabric
28” square batting (I used Bliss Batting from Thermoweb)
Cutting:
From the Gray Mini Cabins:
(1) 7-1/4” square
From the White Sparkle Dot:
(1) 7-1/4” square
(4) 3-1/2” squares
(2) 2” x 21-1/2” strips
(2) 2” x 18-1/2” strips
(2) 2” x 15-1/2” strips
(2) 2” x 12-1/2” strips
From the Blue Party Geese:
(1) 4” square
(2) 3-1/2” x 6-1/2” pieces
(1) 3” square
From Denim Stitching Lines:
(1) 4” square
(2) 3-1/2” x 6-1/2” pieces (note cutting orientation in image below)
(1) 3” square
(3) 2-1/4” x WOF strips for binding
From Red Party Geese:
(1) 2” x 24-1/2” strip
(1) 2” x 22-1/2” strip
(1) 2” x 18-1/2” strip
(1) 2” x 15-1/2” strip
(2) 2” squares
From Wine Hexie Pops:
(1) 2” x 24-1/2” strip
(1) 2” x 22-1/2” strip
(1) 2” x 18-1/2” strip
(1) 2” x 15-1/2” strip
(2) 2” squares
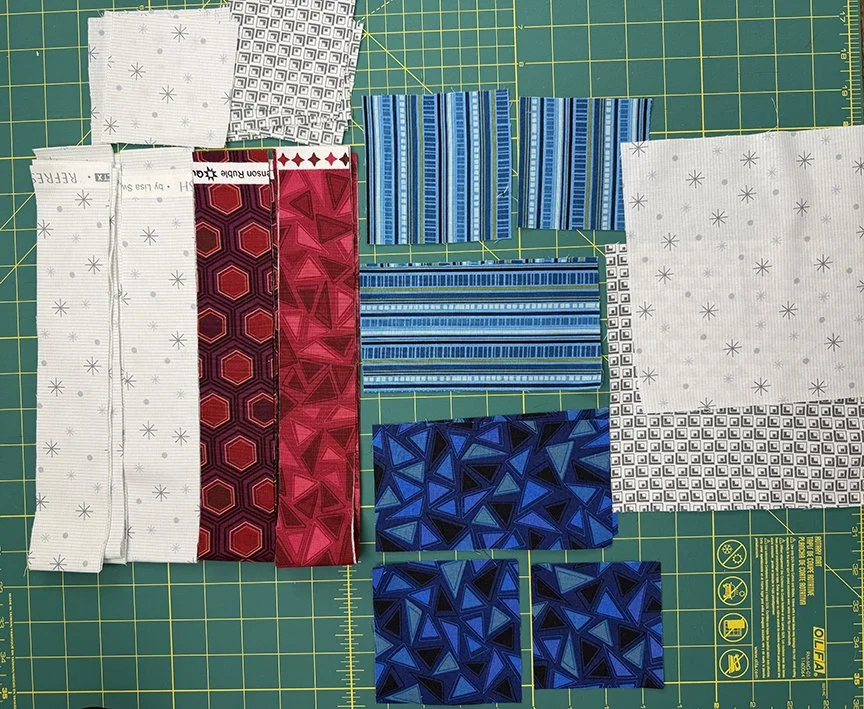
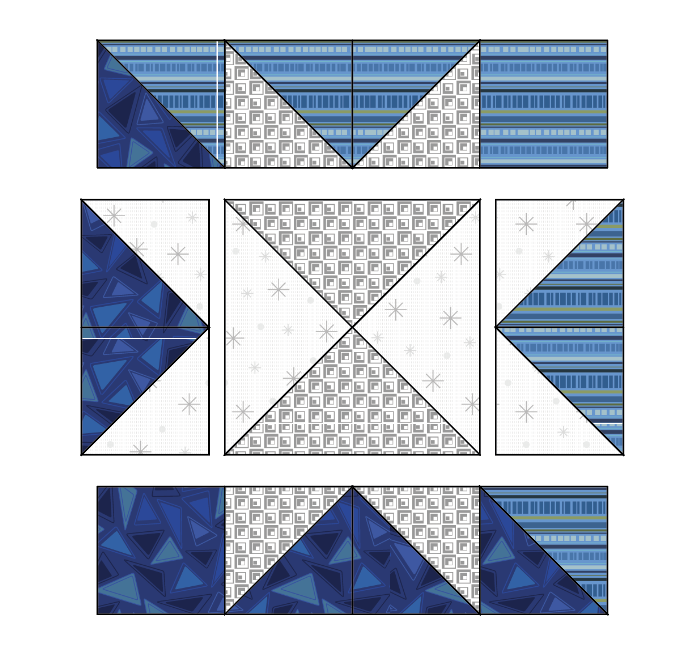
Here are my cut pieces. Note the two orientations of the stripe pieces - that’s to keep the stripe running in the same direction throughout the topper.
Make the Topper
Step 1: Draw a diagonal line on the wrong side of (1) 7-1/4” White Sparkle Dot square, (1) 4” Blue Flying Geese square, and all 3-1/2” and 2” squares.

Step 2: Place the marked 7-1/4” White Sparkle Dot square right sides together on the 7-1/4” Gray Mini Cabins square. Stitch 1/4” on both sides of the drawn line, cut on the line, and press units open. Draw a diagonal line on the wrong side of (1) unit, perpendicular to the seam line. Lay the (2) units right sides together, alternating prints and nesting seams, and then stitch 1/4” on both sides of the drawn line, cut on the line, and press units open. Square up to 6-1/2”. Note: You’ll use (1) hourglass unit for this project and have (1) leftover.

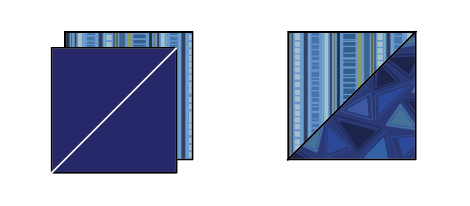
Step 3: Layer the 3” Blue Party Geese square right sides together with the 4” Blue Stitching Lines square, noting orientation of the stripes. Stitch 1/4” on both sides of the drawn line, cut on the line, and press the units open to make (2) HST units. Square up to 3-1/2”.
Step 4: Place a marked 3-1/2” Gray Mini Cabins square on the left end of (1) 3-1/2” x 6-1/2” Blue Party Geese piece. Stitch on the drawn line, trim seam allowance to 1/4”, and press open. Repeat on the right end to make a flying geese unit.

Step 5: Repeat Step 4 to make a total of (4) flying geese units, noting color combinations and stripe orientation.

Step 6: Lay out (1) hourglass unit, (2) HST units, (4) flying geese units, and (1) each 3-1/2” Denim Stitching Lines and Blue Party Geese squares into (3) rows of (3). Sew into rows and join the rows to make the star center block.
Step 7: Refer to the Quilt Layout Diagram near the bottom of this tutorial as you assemble the quilt. Sew 2” x 12-1/2” White Sparkle Dot strips to opposite sides of the star center block. Sew 2” x 15-1/2” White Sparkle Dot strips to the top and bottom.
Step 8: In the same manner as in Step 4, use the marked 2” Red Party Geese squares to add quick corner triangles to the left end of (1) each 2” x 24-1/2” and 2” x 18-1/2” Wine Hexie Pops strips as shown.

Step 9: Use the marked 2” Wine Hexie Pops squares to add quick corner triangles to the left end of (1) each 2” x 24-1/2” and 2” x 18-1/2” Red Party Geese strips as shown.

Step 10: Sew (1) each 2” x 15-1/2” Red Party Geese and Wine Hexie Pops strips to opposite sides of the center. Sew (1) each pieced 2” x 18-1/2” strips to the top and bottom.
Step 11: Sew 2” x 18-1/2” White Sparkle Dot strips to opposite sides of the center. Sew 2” x 21-1/2” White Sparkle Dot strips to the top and bottom.
Step 12: Sew (1) each 2” x 21-1/2” Red Party Geese and Wine Hexie Pops strips to opposite sides of the center. Sew (1) each pieced 2” x 24-1/2” strips to the top and bottom to complete the quilt top.

Quilt Layout Diagram
Finishing:
Layer the backing right side down, batting and quilt top right side up. Baste the layers together and quilt as desired. Trim the backing and batting even with the quilt top. Use the (3) 2-1/4” x WOF Denim Stitching Lines strips to bind the quilt. Enjoy!