Heart-apalooza!
With Valentine’s Day around the corner, I’ve been working on a couple heart-themed projects. I am not a “pink” girl, so I chose to use a rainbow of colors from my Nature Unfiltered fabric collection for these projects.
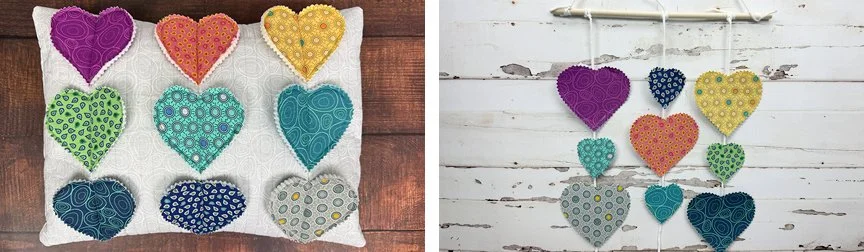
In a FB Live in the Thermoweb Craft Room, I am showing how to create these hearts, and then how to use them for the pillow and the mobile shown above. Below, I’m sharing the more complete instructions for how to finish the pillow. So head over to Thermoweb for the heart-making details and then assemble the pillow using the numbers here.
Assembling the Pillow
You’ll Need:
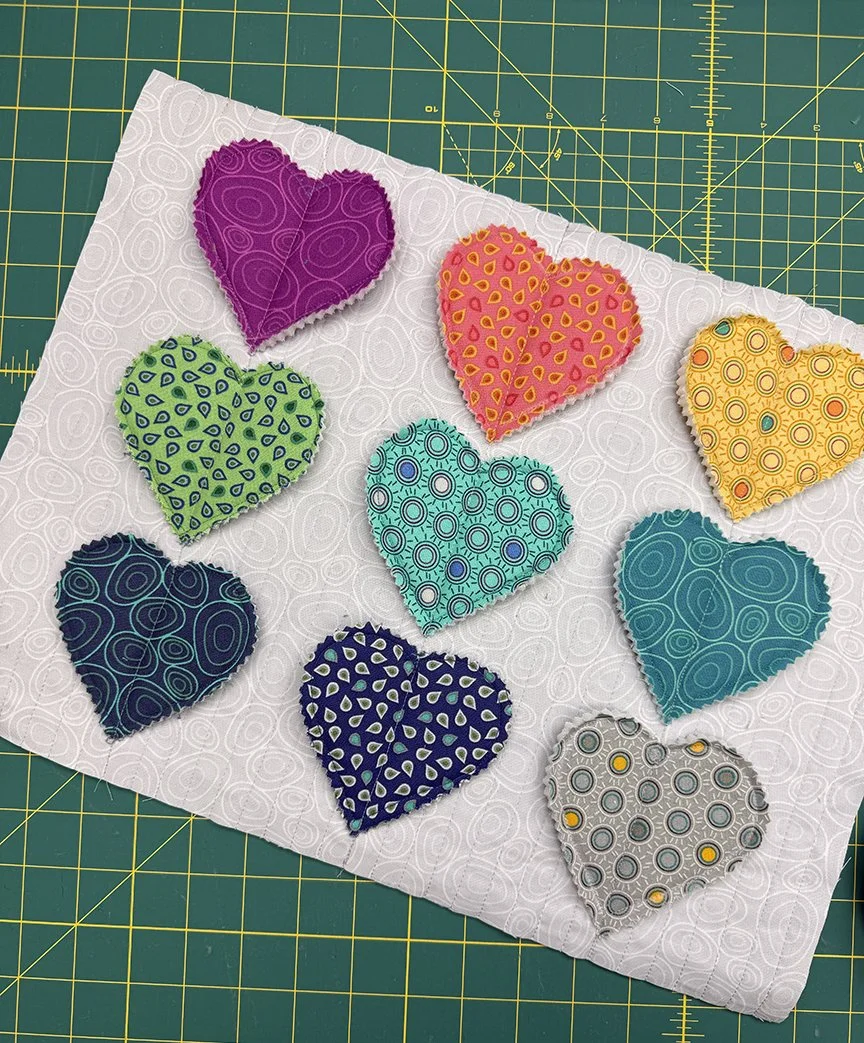
*9 large hearts (see Thermoweb tutorial)
*7/8 yard Cloud Puddles print (Nature Unfiltered again)
*12″ x 16″ pillow insert
*HeatnBond Fusible Fleece
Cutting:
From the Cloud Puddles print:
(1) 13” x 17” rectangle
(2) 12-1/2” x 20” rectangles (for pillow backing)
From the Fusible Fleece:
(1) 13” x 17” rectangle
Step 1: Fuse the 13” x 17” Fusible Fleece rectangle to the wrong side of the 13” x 17” Cloud Puddles rectangle.
Step 2: Using a walking foot, machine quilt straight vertical lines approximately 1/4” apart. Trim to measure 12-1/2” x 16-1/2”
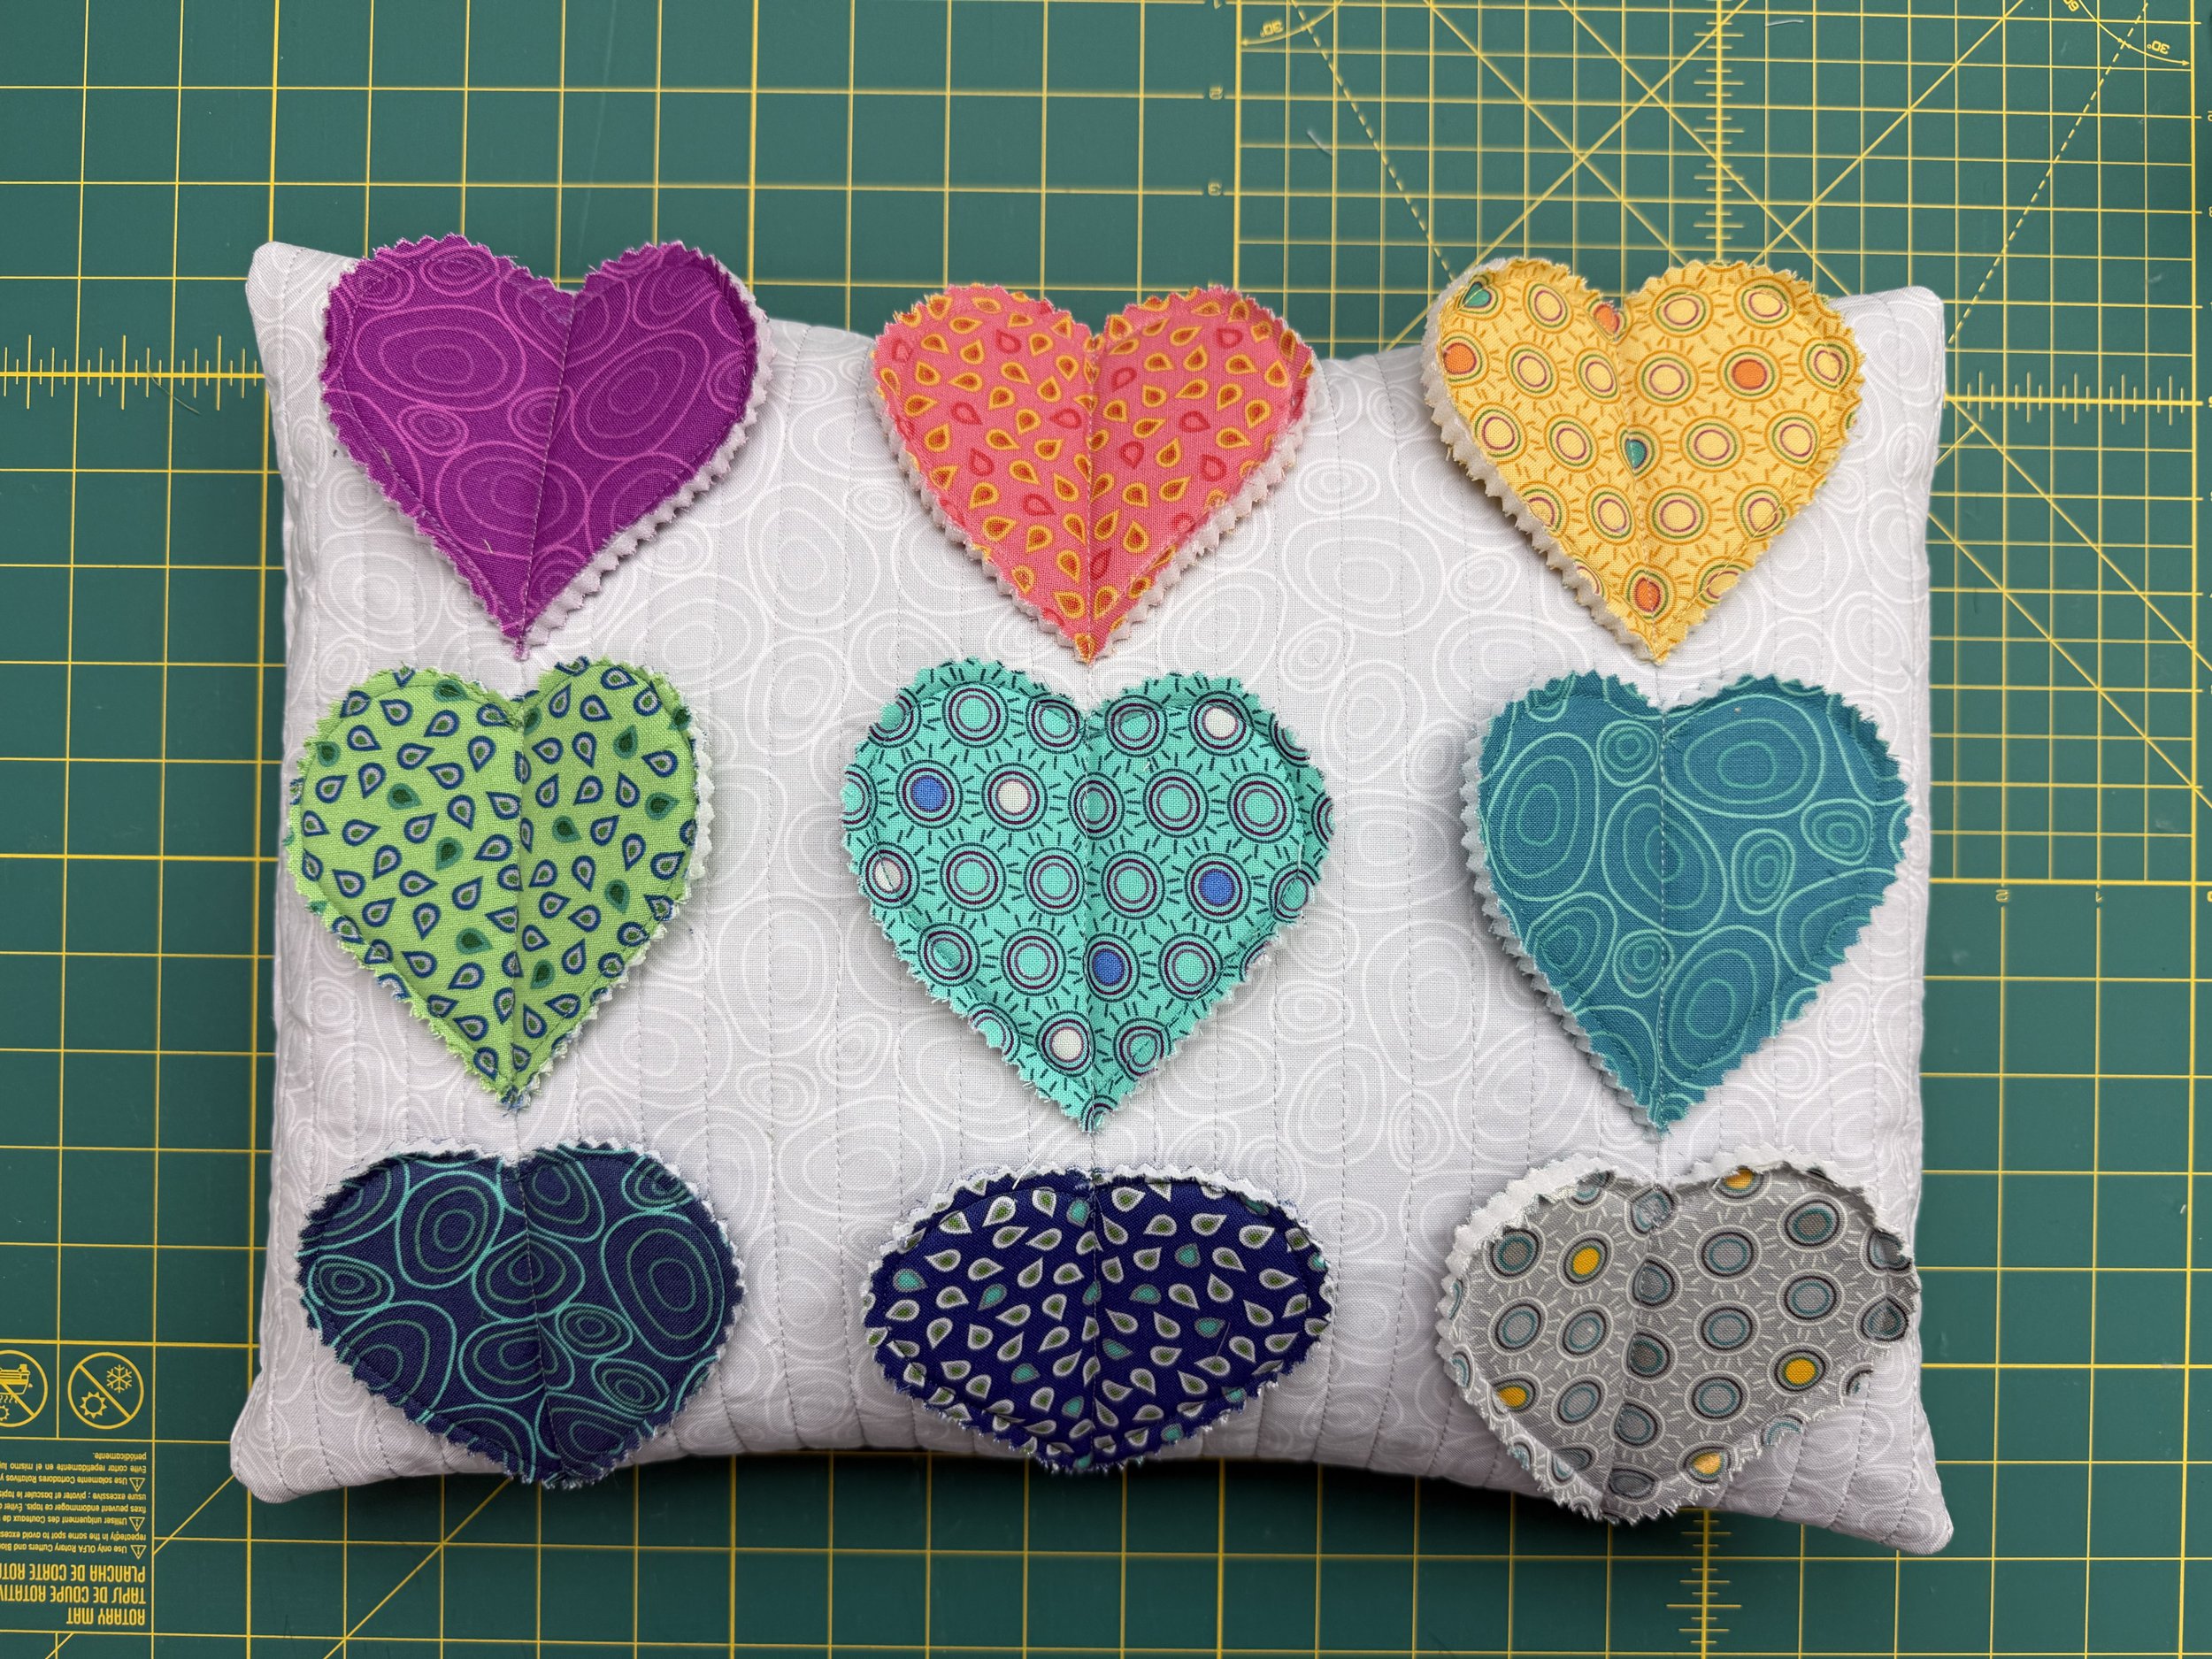
Step 3: Position 3 hearts down the center of the pillow, evenly spaced, and pin in place. Make sure the hearts are more than 1/2” from the edges of the pillow front.
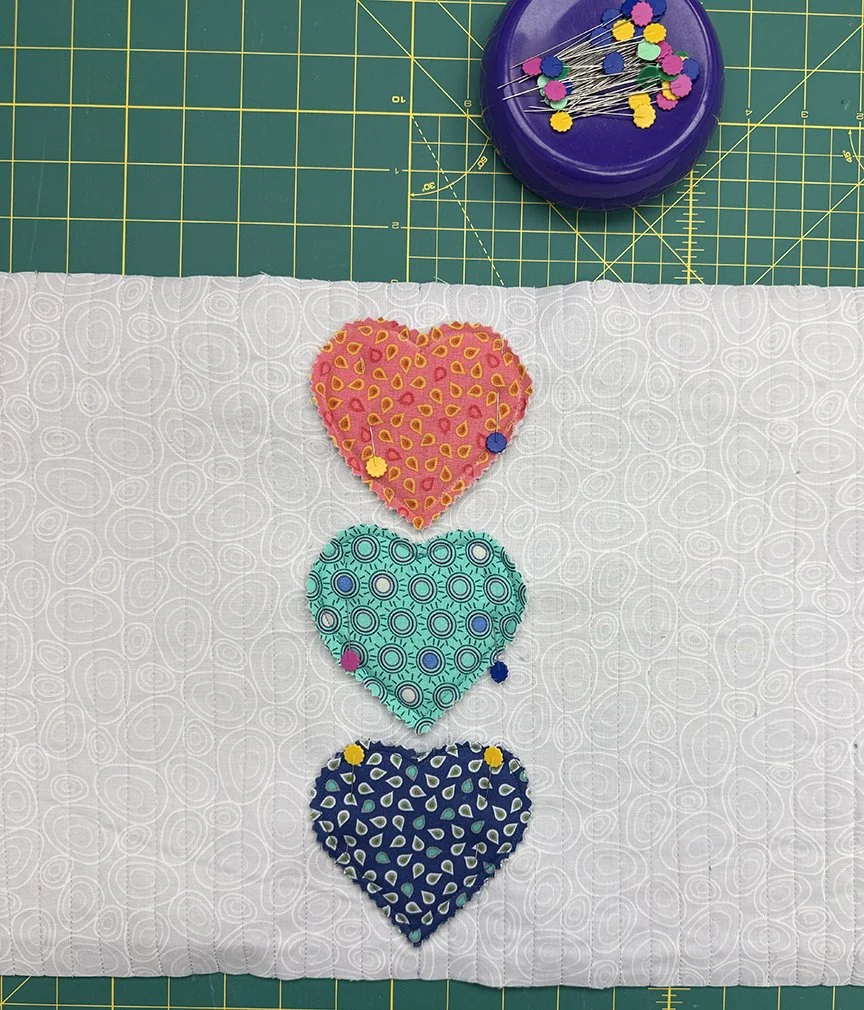
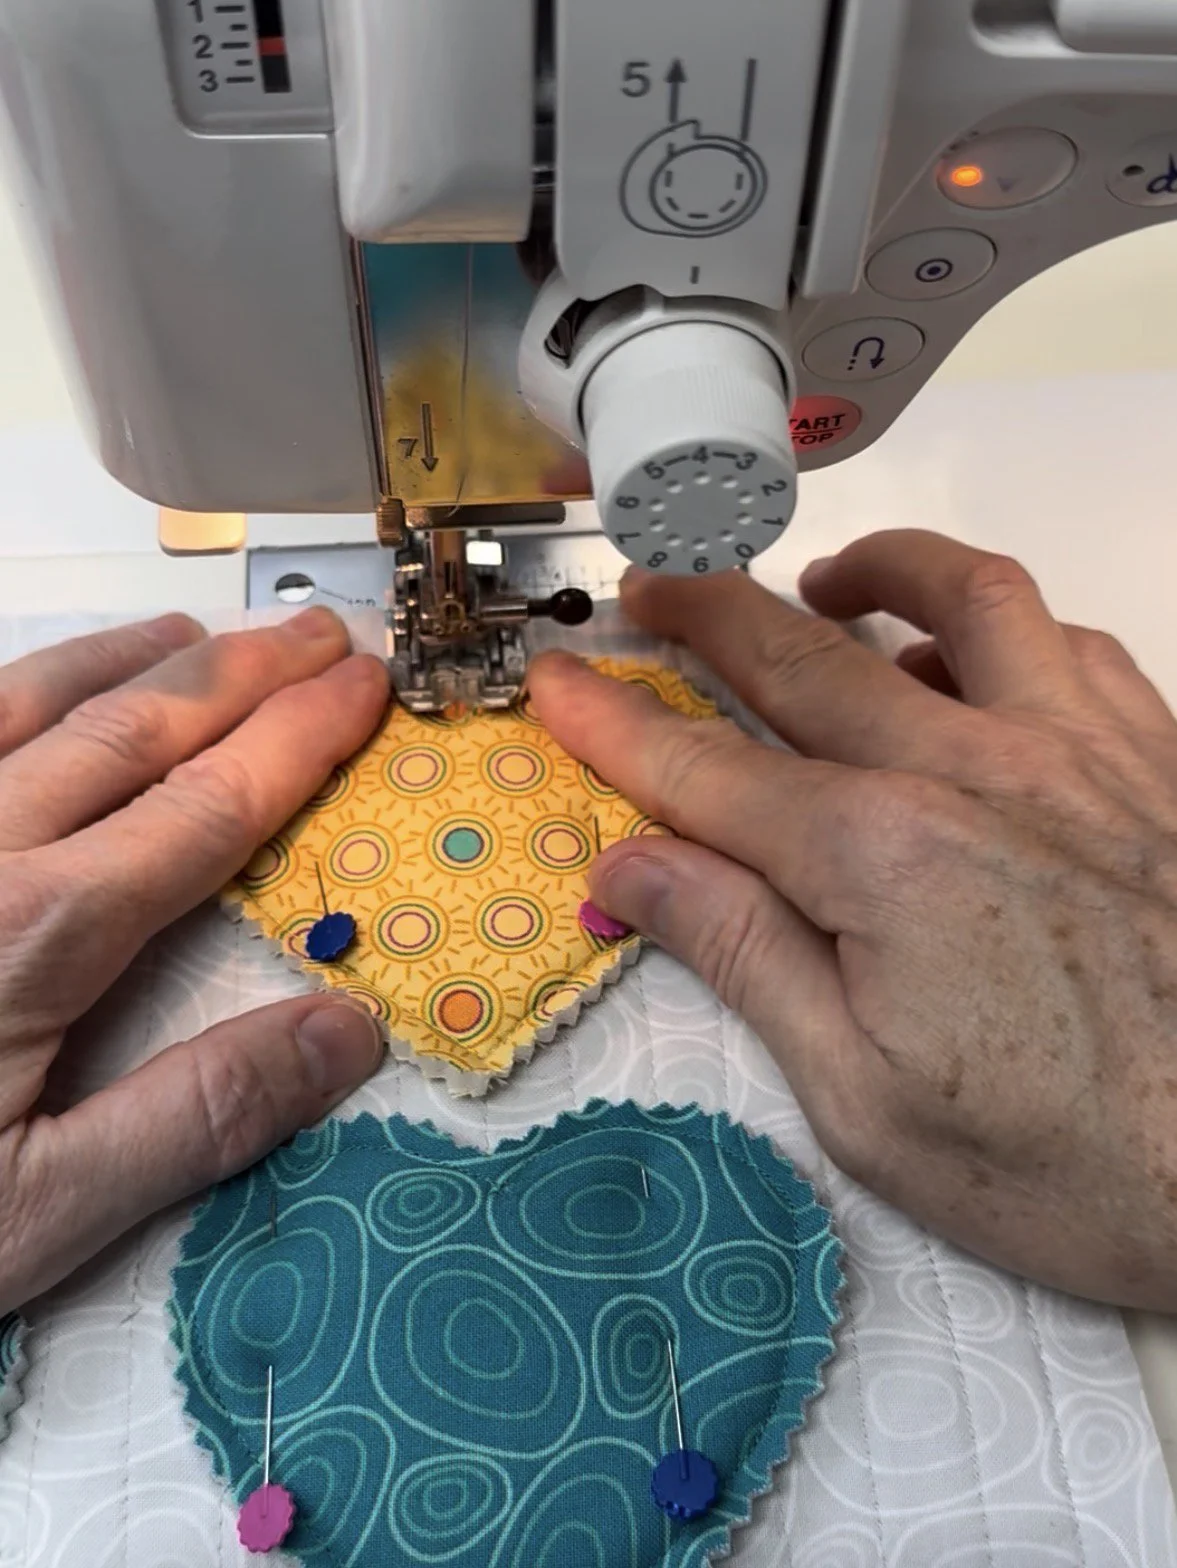
Step 4: Starting at the top edge of the pillow front, stitch the hearts in place (still using a walking foot). Continue stitching off the bottom of the pillow front. Repeat for all 3 heart rows. Tip: If possible, try to position hearts and stitch on an existing quilted line - it’s easier!
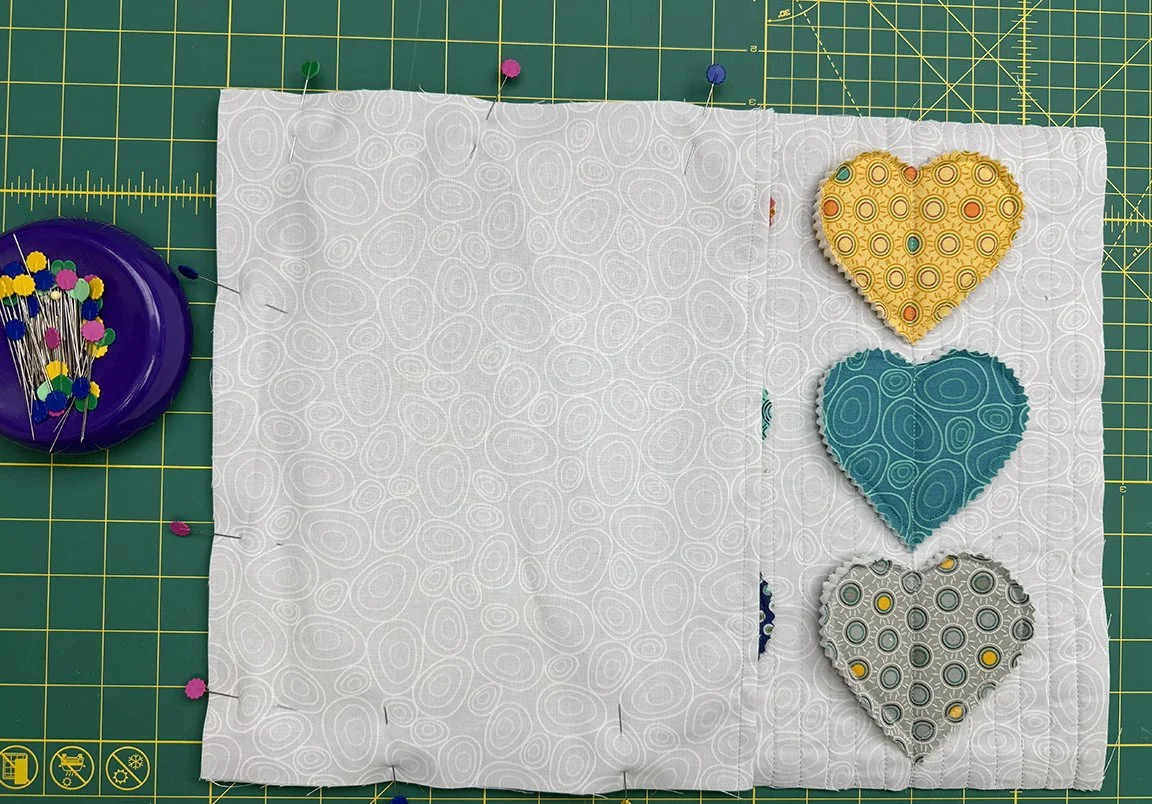
Here’s what your finished pillow top will look like!
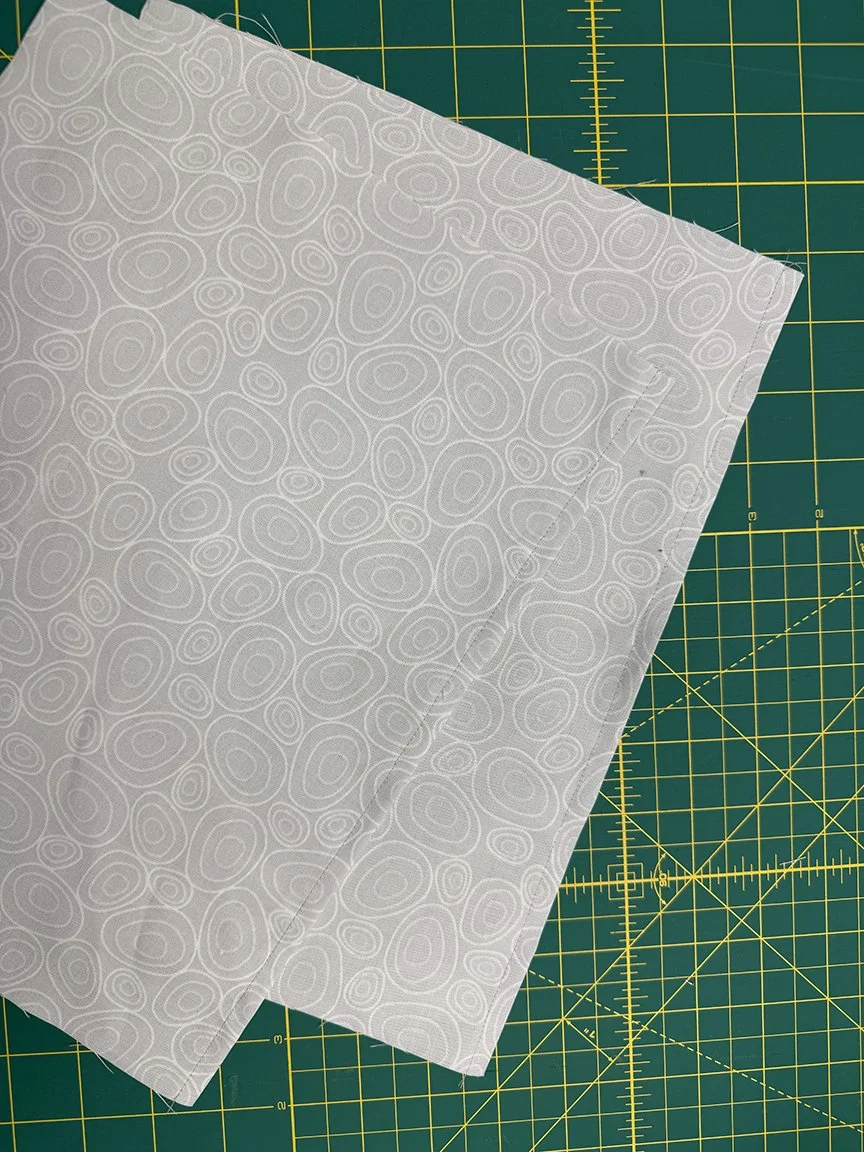
Step 5: Fold each 12-1/2” x 20” Cloud Puddles rectangle in half to make a 12-1/2” x 10” rectangle for a backing piece. Topstitch along the folded edge for a finished look.
Step 6: Lay the pillow front right side up. Position a backing piece on top, matching raw edges on one end. Pin in place. Repeat with the second backing piece on the opposite end. After pinning both in place, stitch around all sides using a 1/4” seam allowance. Turn right side out.
Step 7: Turn the pillow cover right side out and stuff with the insert. Your pillow is complete!