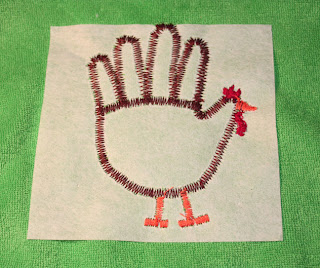
Gobble Gobble! Quick Turkey Tutorial
Late last night, I remembered that I made this cute turkey bib for my oldest's first Thanksgiving.
A while back, I bought a 10-pack of colored terrycloth bibs. Today, I went out to buy more fusible web, as I'd run out while working on a project over the weekend (don't you hate that?!?!).
Then I got started. This was so quick and easy to make that I thought I'd share it as a tutorial.
Remember tracing your hand as a kid and turning it into a turkey? That's the basis for the idea here. The turkey in the bib above is a rough tracing of my munchkin's hand. I simply used that same shape again.
(I scanned the hand shape in and you can download it here if you don't have a little hand model at your house.)
I drew a line across the bottom of the fingers (you'll see it on the scan) and then traced each finger and the palm/thumb shape separately onto fusible web.
Cut out the shapes loosely around the tracings and fuse to the wrong side of your selected fabric. The key here is to pick very small prints, because the shapes are tiny, and once you zigzag stitch around them, the area of fabric you see is even smaller.
Here's my big tip for fusible web: Before cutting the fused fabric out on the drawn line, begin pulling the paper off the web. Pull far enough that you lift up the edge of the paper inside your shape. Then cut out your shape (you can press the lifted edge down so that you cut accurately).
Why? So often when I remove the paper after I've cut out the shape, I end up fraying and/or distorting the edge of my fabric shape. So frustrating! So by starting to peel beforehand, you avoid this.
Arrange the shapes centered on your bib and fuse in place.
Cut a piece of stabilizer larger than the turkey and pin to the back of the bib. Select a tight and medium-length zigzag stitch, thread color (I used brown), and stitch around all edges of all turkey pieces.
To do the beak, comb and wattle (had to look that one up--couldn't remember what it was called), I adjusted stitch width as I sewed. So, for the beak, I started with the longest zigzag stitch and sewed a few stitches. Then, while the needle was up, I moved to a medium-length stitch and sewed a few more stitches. Then I moved to a very short stitch and made the tip of the beak. I used a similar technique for the comb and wattle.
Here you can see the backing, with the stabilier. After I finished appliqueing, I trimmed the stabilizer to just around the turkey shape.
And you're done!
My finished turkey:
The finished bib:
I popped it in the mail today; my sister should receive it on Wednesday. Her little family of three is having Thanksgiving with her in-laws, but I can't wait to see her little turkey (and his bib!) over the weekend!
p.s. Don't forget to check back here on Wednesday for my Holiday Lane pillow post (and giveaway!), part of the Holiday Lane blog hop at Sew We Quilt.


